Stitch’s Import API allows you to push arbitrary data from a source to your Stitch account. Generate your API credentials and push your first batch of data with this guide.
Prerequisites
An active Stitch account. To create an account, sign up for a free trial here.
Step 1: Obtain your API credentials
The Import API uses an API access token to authenticate requests. In this step, you’ll create an Import API integration in your Stitch account and generate an API access token.
We’re using the Stitch app to generate the access token, but you can also use the Connect API if your Stitch account has access.
- Sign into your Stitch account.
- From the Stitch Dashboard page, click Add Integration.
- Click the Import API icon.
-
Enter a name for the integration. This is the name that will display on the Stitch Dashboard for the integration; it’ll also be used to create the schema in your destination.
Note: Schema names cannot be changed after the integration has been saved.
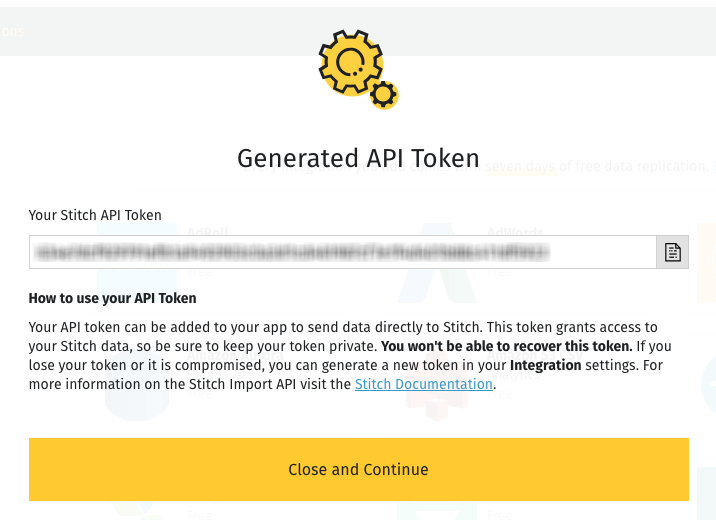
- Click the Save and Generate Token button to generate and display the token.
- Copy the token.
Note: Stitch will only display the access token once, so be sure to save it before clicking Close and Continue. If you forget to copy the token or misplace it, you can create a replacement and revoke the original token.
Step 2: Retrieve the correct Import API base URL for your region
Next, you’ll identify the data pipeline region your Stitch account is in. You’ll use this to retrieve the correct Import API base URL for your account’s region.
The base URL is used in requests submitted to the Import API and is similar to https://api.stitchdata.com.
To identify your region and get your base URL:
- Use these instructions to locate your account’s data pipeline region.
- Refer to the Import API base URL reference to locate the base URL for your region.
- Use the Select your region menu at the top right corner of this page to select your data pipeline region. This will display all API requests in this guide with the correct base URL for your region.
Your base URL is currently set to:
Step 3: Check the status of the Import API
Next, check the status of the Import API by sending a request to GET /v2/import/status. This will ensure that the test request you send in the next step, which will validate your credentials and some sample data, will not fail due to an API outage.
Note: Using this endpoint doesn’t require authentication.
curl "https://api.stitchdata.com/v2/import/status"
When the Import API is operating correctly, it will return a 200 OK status and an API status object:
{
  "name": "pipeline.gate",
  "version": "0.3.3-SNAPSHOT",
  "revision": "a154360ad8c43182965049dbf6239aa7c1f3c84d",
  "status": "OK",
  "reason": null
}
If the Import API returns a 5xx response, check the Stitch Status page for reported outages and try again later.
Step 4: Push a batch of data to Stitch
To push data to Stitch, use the Create a batch endpoint. This endpoint uses a JSON schema to validate and type the data in the records sent to the Import API.
Once the request is processed, data will be loaded into the destination connected to your Stitch account.
In the example below, the request will send a single record for the customers table to the Import API:
curl -X "POST" "https://api.stitchdata.com/v2/import/batch" \
     -H 'Authorization: Bearer [ACCESS_TOKEN]' \
     -H 'Content-Type: application/json' \
     -d \
'{
   "table_name":"customers",
   "schema":{
      "properties":{
         "id":{
            "type":"integer"
         },
         "name":{
            "type":"string"
         },
         "age":{
            "type":"integer"
         },
         "has_magic":{
            "type":"boolean"
         }
      }
   },
   "messages":[
      {
         "action":"upsert",
         "sequence":1565880017,
         "data":{
            "id":1,
            "name":"Finn",
            "age":15,
            "has_magic":false
         }
      }
   ],
   "key_names":[
      "id"
   ]
}'
If successful, the Import API will return a 2xx status and a Batch Status object.
If the status is 201, this means that the request was accepted and will be processed later. New data will be added once the request is processed. The response body will be:
{
  "status": "OK",
  "message": "Batch Accepted!"
}
If the status is 202, this means that the request was accepted, but cannot currently be processed due to an internal error. Data will be automatically re-processed. The response body will be:
{
  "status": "Accepted",
  "message": "The batch is queued to be processed."
}
Step 5: Verify the data in the destination
After you’ve pushed a batch of data to the Import API, Stitch will queue it for processing.
Stitch’s replication process consists of three distinct steps: Extraction, preparation, and loading. Each step occurs independently and takes a bit of time to complete, which means you won’t immediately see data in your destination after it’s been pushed to the Import API. Refer to the Monitoring replication progress documentation for more info.
When Stitch loads the data into the destination, it will be in the schema or dataset associated with the Import API integration you created in Stitch. The integration’s schema name is located on the Integration Details page in Stitch, under the integration’s display name:

In this example, Stitch would create a table named customers with a single record in a schema named import_api:
| id | name | age | has_magic |
| 1 | Finn | 15 | false |
Note: How data is structured in your destination depends on how attributes are typed in API requests and the type of destination Stitch loads data into. Refer to the Structuring data for the Import API guide for more info.
Next steps
Congratulations on pushing your first batch of data! Next, we recommend checking out:
- Structuring data for the Import API: Learn how to structure and type data in your Import API requests.
- Sequencing data for the Import API: Learn how the Import API considers data points for loading, which affects how data is updated in your destination.